

This tutorial will guide you through the steps to create a Neural Style Transfer as described by [1] using the VGG model [2].
Step 1 – Importing The Model
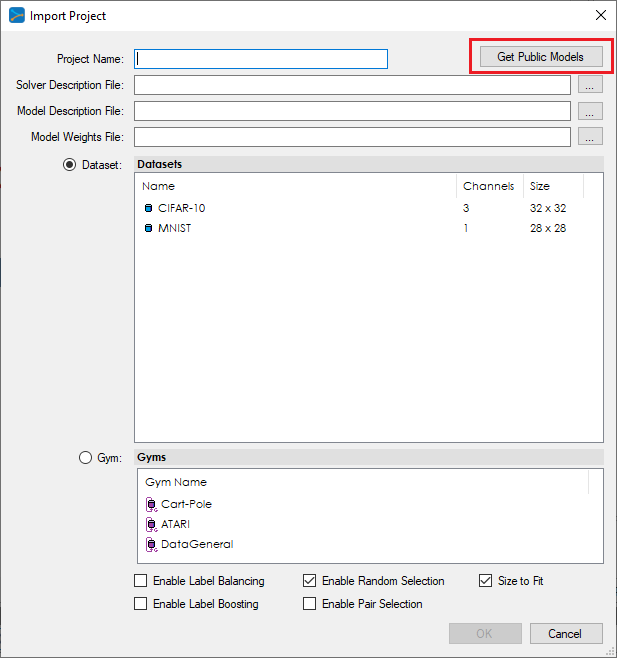
To get started, you must first import the VGG model by selecting the File | Import menu item, which will display the Import Project dialog, shown below.
From the Import Project dialog, select the Get Public Models button to display the Public Models dialog shown below.
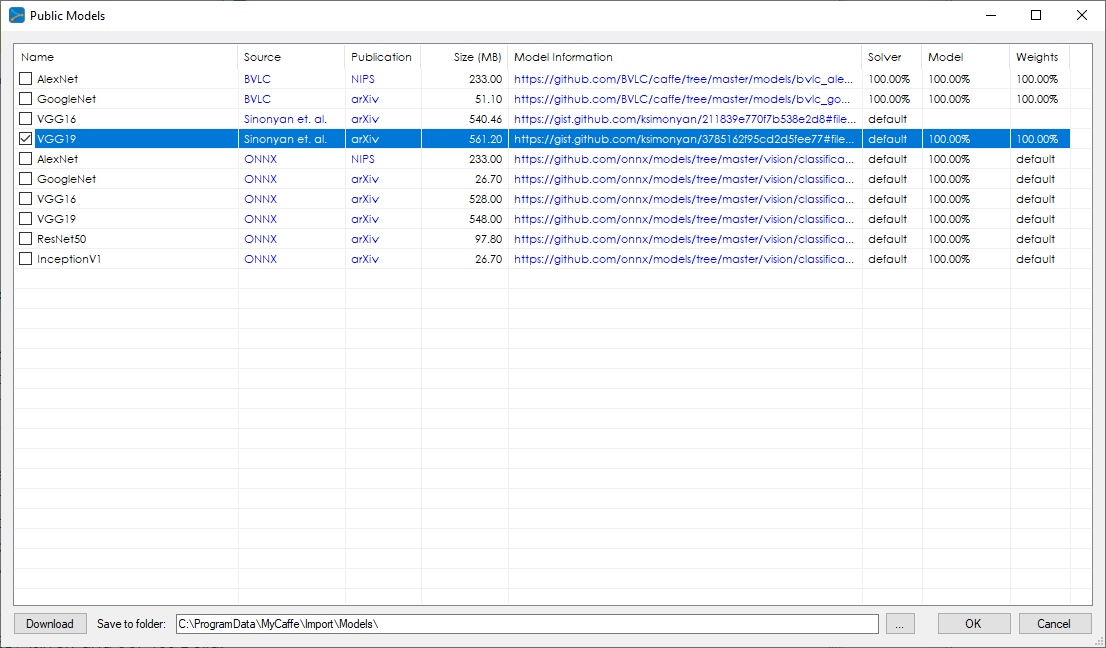
From the Public Models dialog, check the first VGG19 model from ‘Sinonyan‘ and select the Download button to download the model descriptor, solver descriptor and trained weights (which can take a minute or two depending on your internet connection). The percentages to the right of each item update to show the download progress.
Once downloaded, select OK and enter the project name ‘VGG19’ in the Import Project dialog.
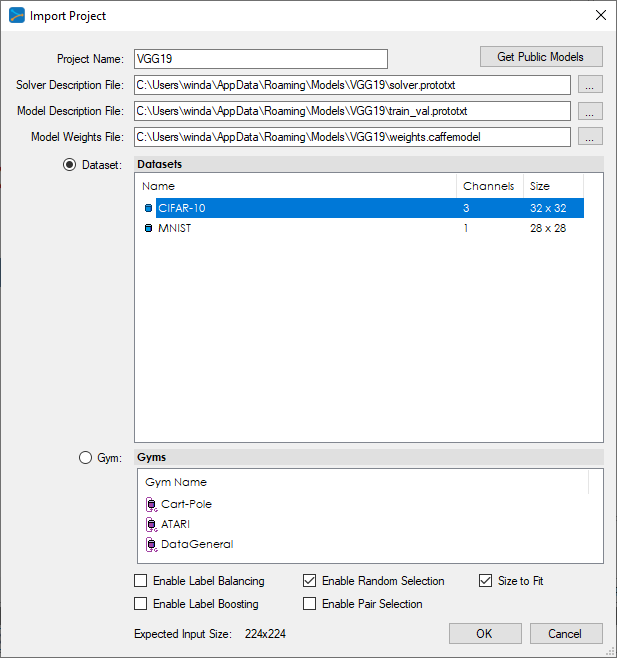
Even though it will not be used, select the CIFAR-10 dataset as well and press OK to add the new project.
Step 2 – Opening The Project
Once added, right click on the new VGG19 project and select the Open menu item to open the project.
Step 3 – Verifying the Weights
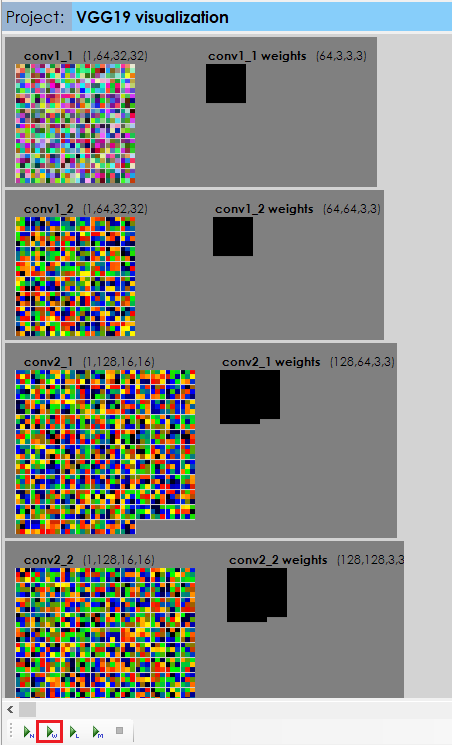
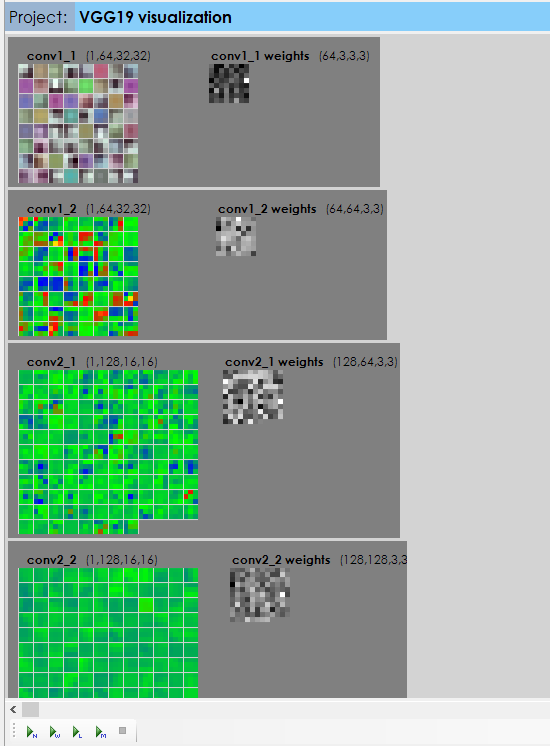
Before running a neural style transfer, it is a good idea to verify that the proper weights are loaded. To verify the weights, first double click on the ‘Accuracy’ tree item from the open VGG19 project. Next select the ‘View Weights’ button at the bottom of the ‘Project Visualization’ window which will then display the contents of the loaded weights.
If your weights look like a bunch of random numbers such as displayed below, then you have NOT loaded the weights correctly.
To load the correct weights, right click on the Accuracy item (the project must be open) and select the Import menu item. Fill out the path to the weight file and press the Show Details button.
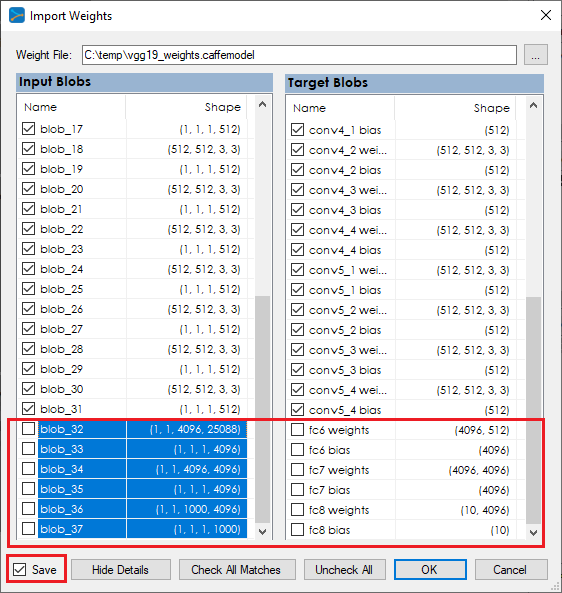
When importing the weights, select all blobs up until the first size mis-match (unchecked blob) and leave all remaining blobs unchecked. Next, select the Save check box and press OK to load the weights. Once loaded, the weights should look as shown below for the VGG19 model.
Step 4 – Evaluating the Neural Style
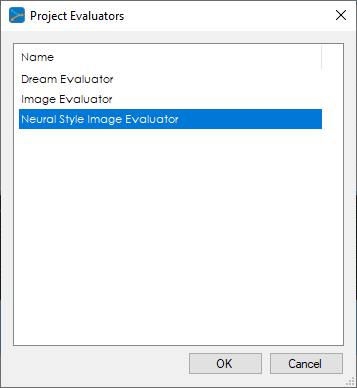
After the project completes opening (green light stops flashing), right click the VGG19 project again, but this time select the Evaluate menu item which then displays the Project Evaluators dialog.
Press OK to open the evaluator. To run the neural style evaluator, enter the user image which will provide the image content. Next, enter the style image used to provide the style (e.g. Starry Night by Vincent Van Gogh). To start the evaluator, select the Run (![]() ) button and let the evaluator learn and apply the style to create a new art piece.
) button and let the evaluator learn and apply the style to create a new art piece.
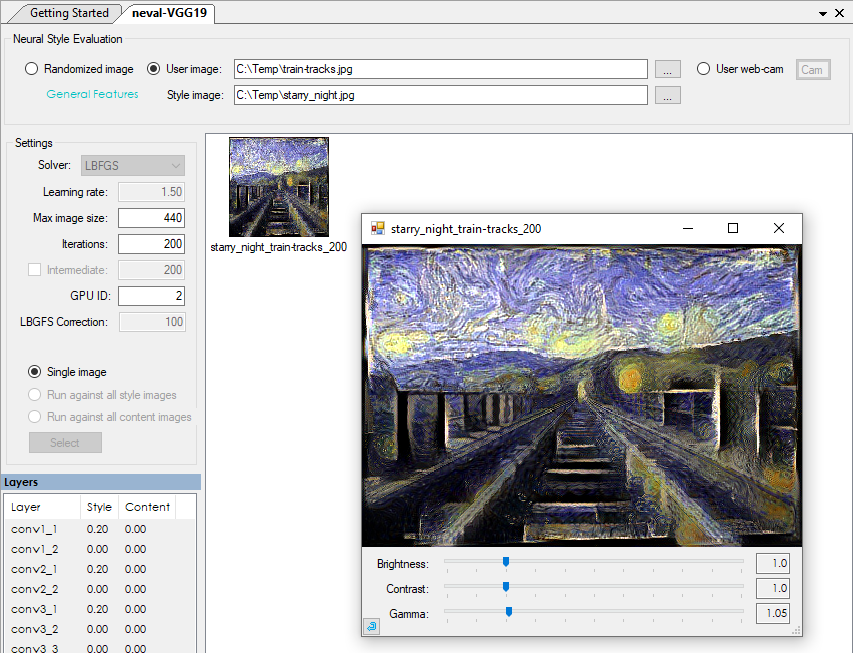
Congratulations, you have now created your first Neural Style Transfer using the SignalPop AI Designer!
Final Notes
When using the Neural Style Transfer evaluator, we do limit what the general application and DEMO version’s can do. Each version of the SignalPop AI Designer supports the following Neural Style Transfer features.
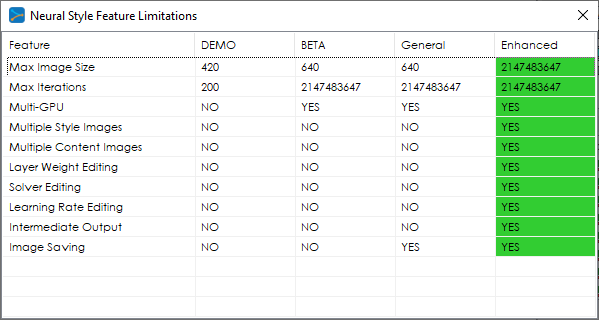
If you are interested in creating high-resolution images, contact us for more information about the Enhanced version.
[1] Leon A. Gatys, Alexander S. Ecker, and Matthias Bethge, A Neural Algorithm of Artistic Style, 2015, arXiv:1508:06576.
[2] Karen Simonyan and Andrew Zisserman, Very Deep Convolutional Networks for Large-Scale Image Recognition, 2014, arXiv:1409.1556.