

This tutorial will guide you through the steps to create a Domain-Adversarial Neural Network (DANN) as described by [1].
Step 1 – Create the Datasets
Before creating the model, the DANN requires two datasets, a source and a target. For these we will use a 3-channel standard MNIST dataset for the source and another 3-channel MNIST dataset that is overlaid on top of a user specified image to simulate a domain separate from the source.
If you have not already done so, you will need to download the MNIST data files which you can get here.
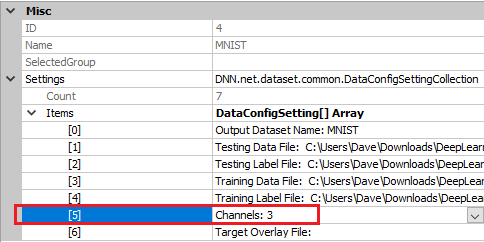
To create the source dataset, you will first set the MNIST Dataset Creator to use 3-channels as shown below.
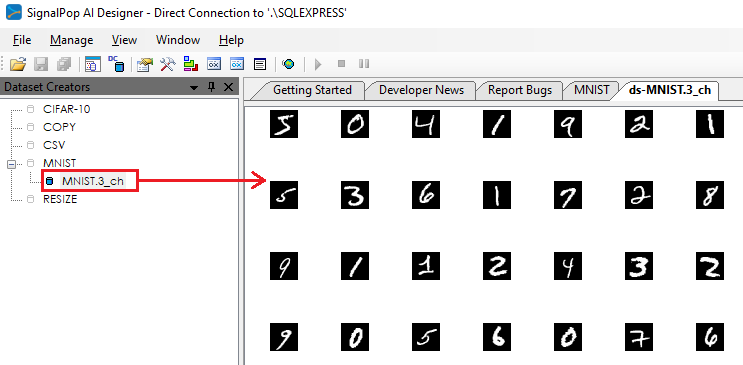
Enter the path to each data file in the properties window for the MNIST Dataset Creator and press the Run (![]() ) button to start creating the dataset. Once completed, the new dataset will be named MNIST.ch_3 and look as follows.
) button to start creating the dataset. Once completed, the new dataset will be named MNIST.ch_3 and look as follows.

To view the new MNIST dataset, expand the MNIST Dataset Creator and double click on the new MNIST.3_ch dataset.
Double clicking on any image will show a larger view of the image and right clicking in an area other than an image displays a menu that allows you to view the Image Mean.
Note, this may look the same as a standard 1-channel MNIST dataset, but it is different in that it actually has 3 identical channels which are needed so that the size of this source dataset matches the target dataset that we will create next.
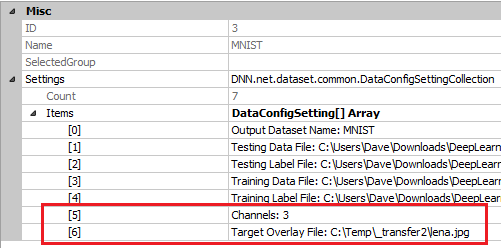
To create the target dataset, run the MNIST dataset creator again with 3-channels, but this time set the Target Overlay File to a file of your choice, such as the common testing 512×512 LENA.JPG image which can be found on Wikipedia.
With these settings, run the MNIST Dataset Creator again. Once completed the new dataset will be named MNIST_Target.3_ch and look as follows.

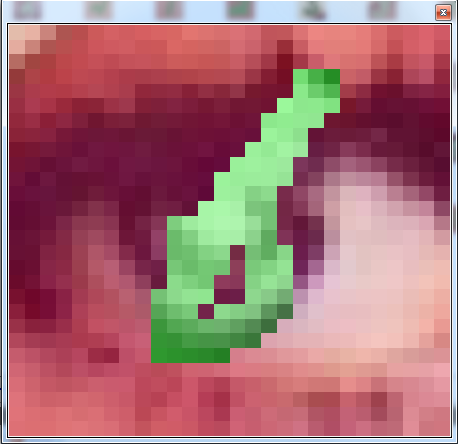
A closer look at one of the target dataset shows the super imposition of an MNIST character onto a portion of the target overlay image.
Now that you have both the source and target datasets, you are ready to create the model.
Step 2 – Creating the DANN Model
The first step in creating a model is to select Solutions pane and then press the Add Project (![]() ) button at the bottom pane.
) button at the bottom pane.
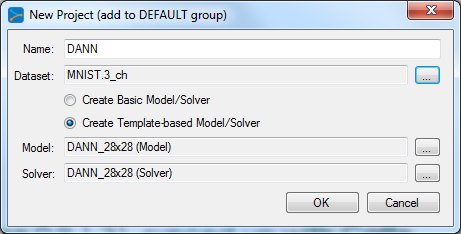
Next, fill out the New Project dialog with the project name, MNIST dataset, and select Create Template-based Model/Solver and use the DANN_28x28 model and DANN_28x28 solver templates.
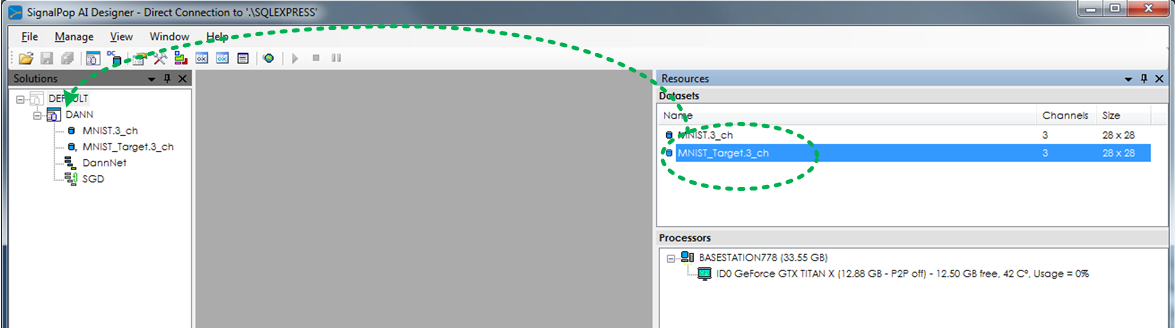
After pressing OK the new DANN project will be added to the solutions. Next, open the Resources window via the View | Resources Window menu (or select its tab on the lower-right of the SignalPop AI Designer).
Select the MNIST_Target.3_ch target dataset and drag-n-drop it onto your new DANN project.
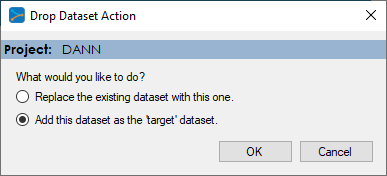
Upon dropping the target dataset the Drop Dataset Action dialog will appear – select the option to add the dataset as the target dataset and press OK.
After updating the project, you will see both the source and target datasets appear in the project as shown above.
To view the DANN model, just double click on the DannNet item within the DANN project. This will open a visual model editor containing the DANN model and should look like the following.
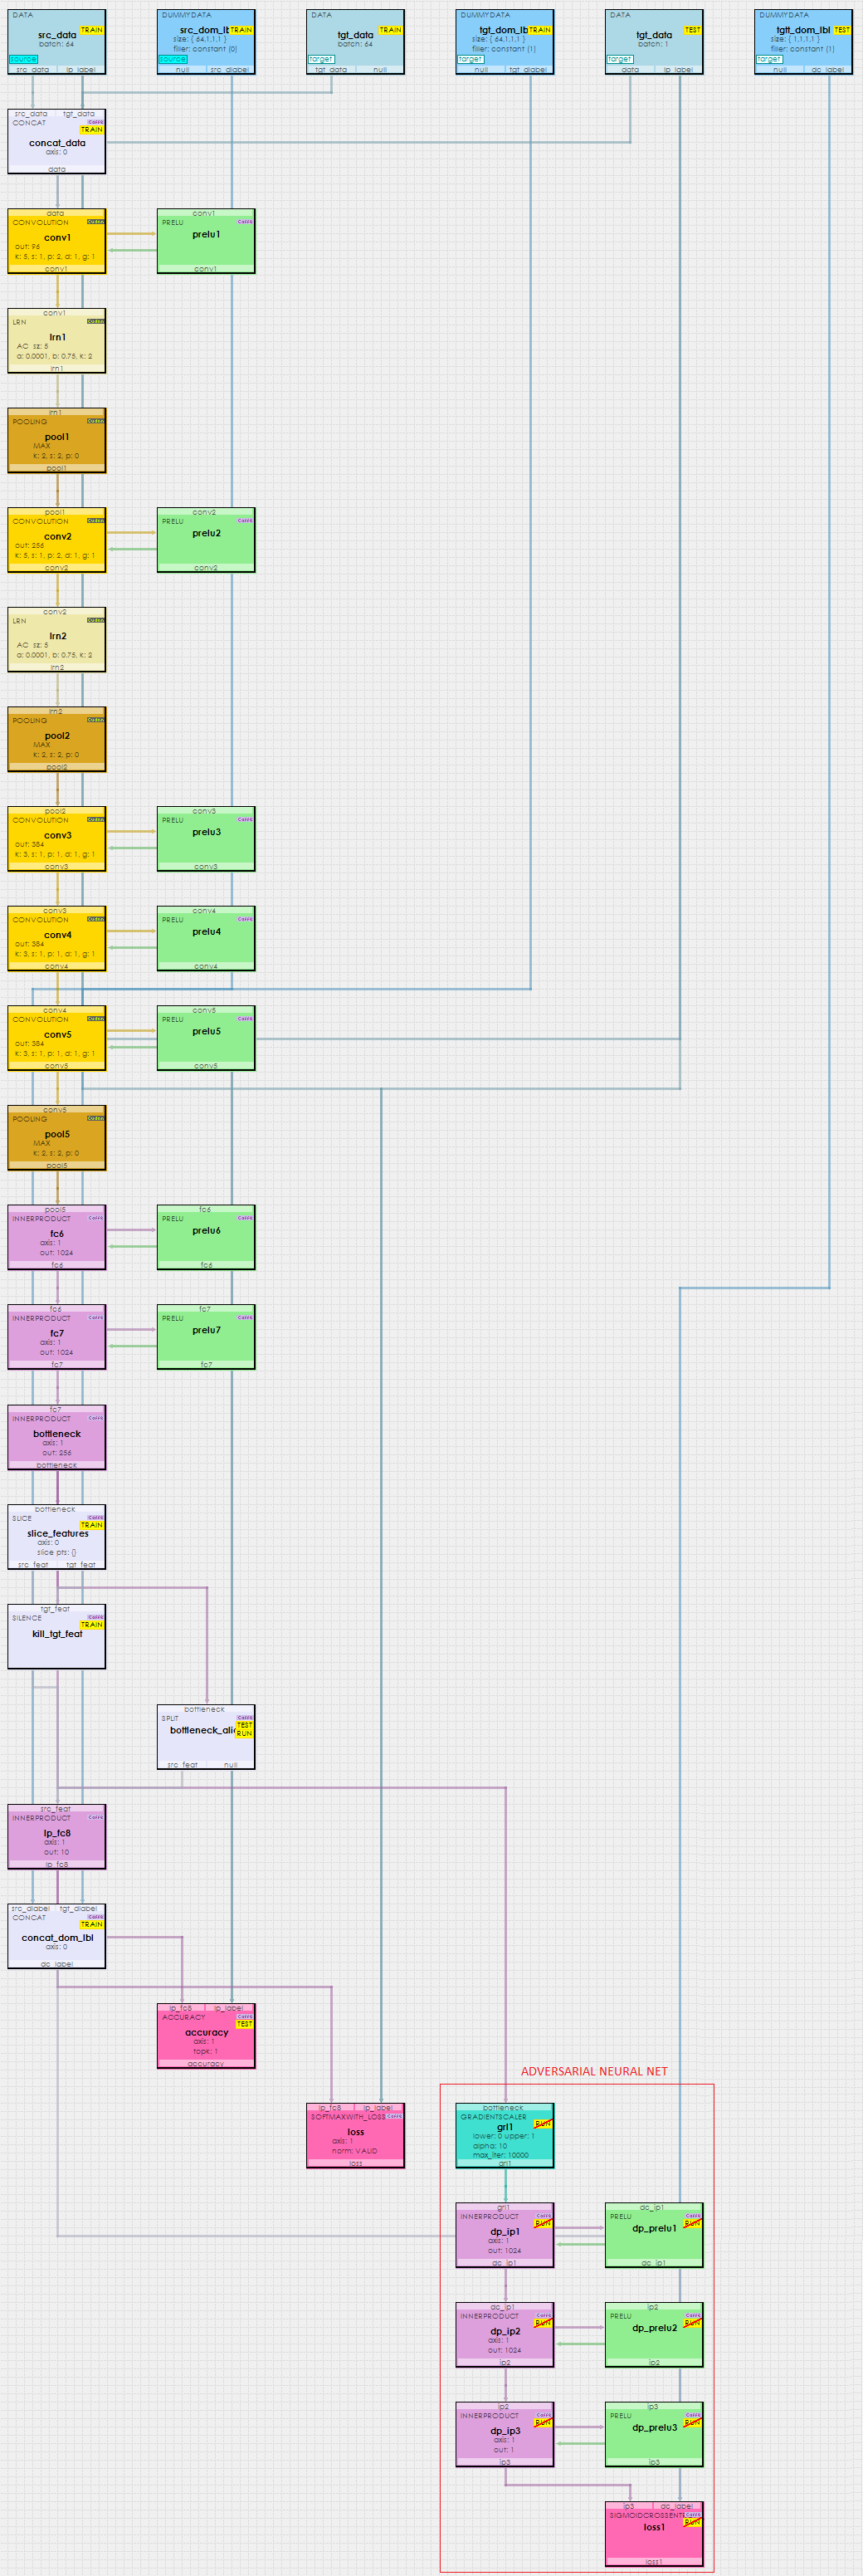
When viewing the DANN model above, there are several items to note. First, the DANN is actually two networks that work adversarial to one another. The first network is a somewhat standard convolutional network on the left up until the bottleneck layer. The second network starts just below the grl1 (GRADIENTSCALER) layer.
The bottleneck layer is where the two networks converge by adding together the weight changes from the first network to those reversed in the second network by the grl1 layer (e.g. the gradient reversal layer).
You are now ready to train your model.
Step 3 – Training the DANN Model
Before training, you must first open the project to load it into the GPU’s used. To view the settings used by the project, select the DANN project and then select the Properties window. There are a few project settings to note that impact how the project operates when open.
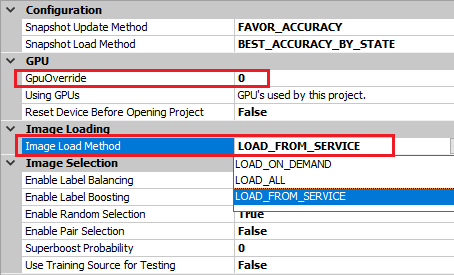
GPU Override – select the GPU ID on which you want to open the project, as shown above we will be using GPU ID 0.
Image Load Method – the image load method specifies how to load the images into memory where the following options are available:
LOAD_ON_DEMAND – this default option causes slower training initially for on each training cycle new images are loaded into memory. Eventually, after all images are in memory the training runs at full speed. However, this option is handy when you would like to quickly open a project for the project load time is very fast.
LOAD_ALL – this option causes all images to load into memory before starting the training which has a slower project load time, but very fast training once all images are in memory.
LOAD_FROM_SERVICE – this option offers a blend of both of the previous options in that all images are loaded in the background by the SignalPop In-Memory Database Service. Once all images are loaded, the service holds all images in memory allowing future projects that use the images to load very quickly. Note when using this option you must configure the service to use a log-on account that also has access to your database.
To open the project, right click on the DANN project and select the Open menu item. A green LED will blink on the project and become solid green once the project is open. When training, it is often helpful to view the progress of the training. To view this information, double click on the DANN project to open the Project Window.
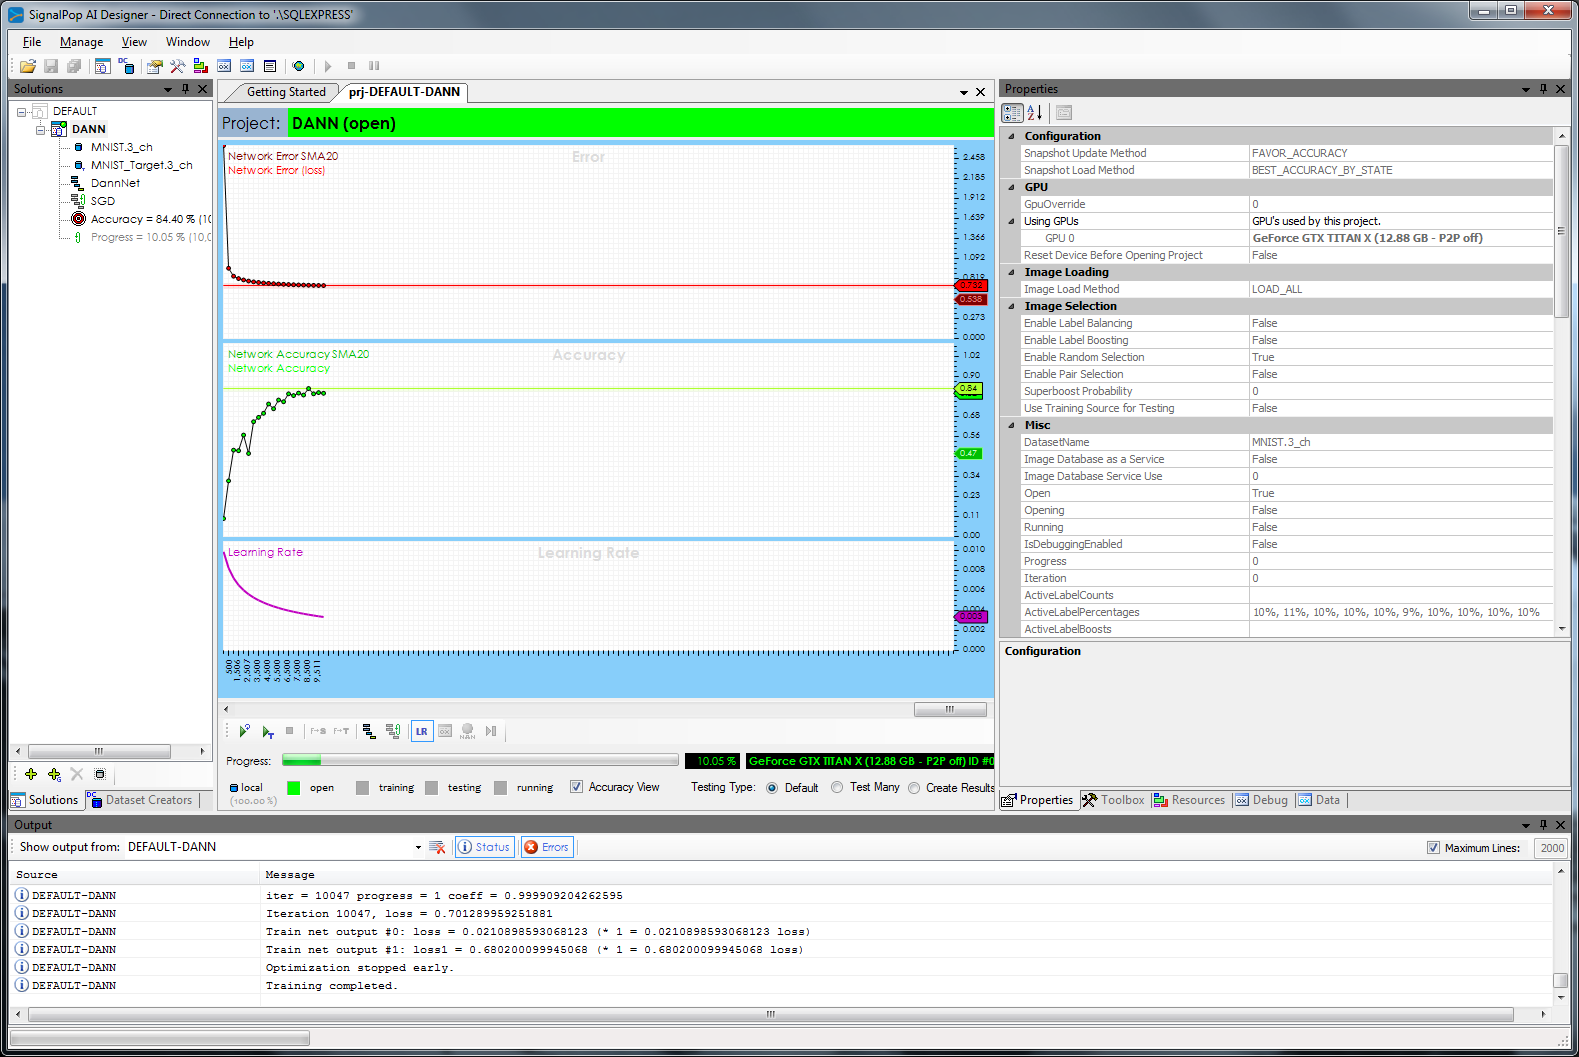
To start training, press the Run Training (![]() ) button in the lower left corner of the Project Window. After training for around 10,000 iterations, you should see an accuracy of 80% or greater.
) button in the lower left corner of the Project Window. After training for around 10,000 iterations, you should see an accuracy of 80% or greater.
After your training has completed, you are ready to validate your model by running it against the target dataset. For this, we will run it against the testing portion of the MNIST_Target.3_ch dataset.
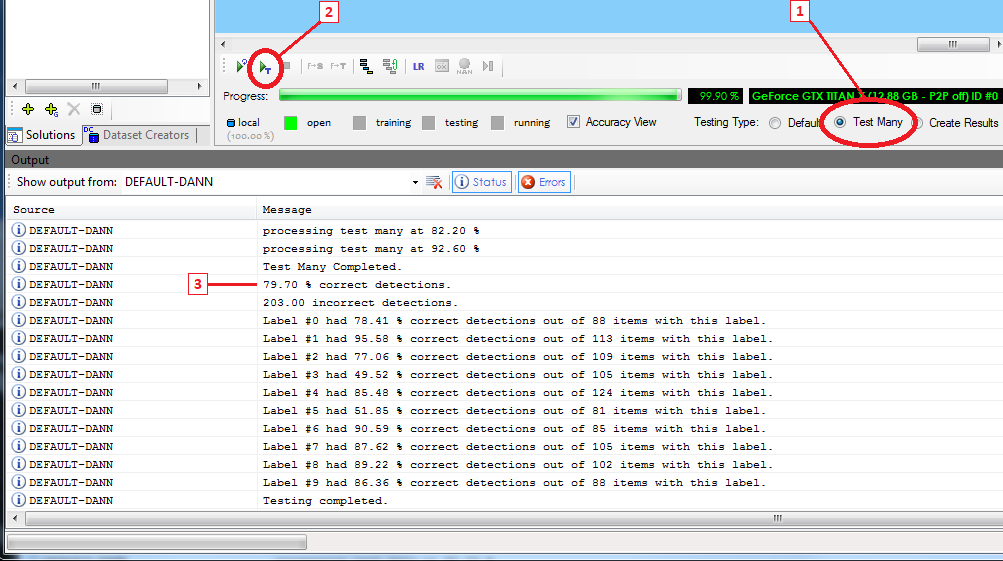
To validate your model, first select the Test Many radio button on the lower right hand side of the Project Window. This test operation runs 1000 randomly selected images from the selected dataset through the model and tabulates the results.
Next, select the Run Testing (![]() ) button to start testing. Before the testing starts, the Select Dataset for Testing dialog will appear. From this dialog select the Target Dataset to start testing on the MNIST_Target.3_ch target dataset within your project.
) button to start testing. Before the testing starts, the Select Dataset for Testing dialog will appear. From this dialog select the Target Dataset to start testing on the MNIST_Target.3_ch target dataset within your project.
You have now created your first Domain Adversarial Neural Network using the SignalPop AI Designer!
[1] Ganin, Y., Ustinova, E., Ajakan, H., Germain, P., Larochelle, H., Laviolette, F., . . . Lempitsky, V. (2016). Domain-Adversarial Training of Neural Networks. Journal of Machine Learning Research 17, 1-35.