

This tutorial will guide you through the steps to create the ResNet-56 and train it on the Cifar-10 dataset as described by [1].
Step 1 – Create the Dataset
Before creating the ResNet-56 model, you will need to create the CIFAR-10 dataset. By default, this dataset contains 3 channels – one channel for each color R, G and B.
Use the CIFAR-10 Dataset Creator to create the CIFAR-10 dataset by configuring the dataset creator with the five training and one testing datafiles making up the CIFAR-10 images. The CIFAR-10 binary version data files can be downloaded from
https://www.cs.toronto.edu/~kriz/cifar.html
or by using the following direct link. Once downloaded, expand the ‘.gz’ file to the following files:
data_batch_1.bin
data_batch_2.bin
data_batch_3.bin
data_batch_4.bin
data_batch_5.bin
test_batch.bin
Enter these files in the CIFAR-10 Dataset Creator’s settings.
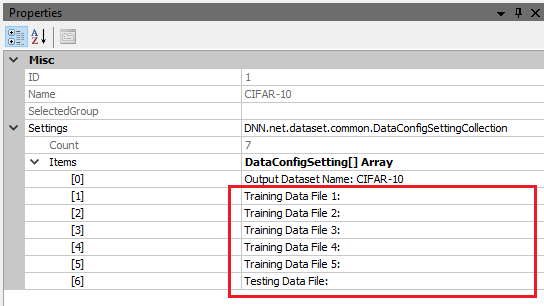
Once set, run the CIFAR-10 Dataset Creator to create the dataset which, when complete, will look as follows.

Step 2 – Creating the ResNet-56 Model
The first step in creating a model is to select Solutions pane and then press the Add Project (![]() ) button at the bottom pane.
) button at the bottom pane.
Next, fill out the New Project dialog with the project name, CIFAR-10 dataset, select Create Template-based Model/Solver and use the ResNet56_32x32 model and ResNet56_32x32 solver templates.
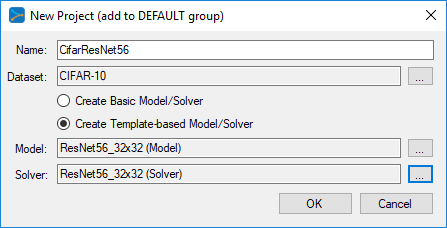
After pressing OK, the new CifarResNet56 project will be added to the solutions.
To view the CifarResNet56 model, just double click on the ResNet-56 item within the CifarResNet56 project. This will open the visual model editor containing the ResNet-56 model which looks as follows.

You are now ready to train the model.
Step 3 – Training the ResNet-56 Model
When training, we recommend using a TCC enabled GPU such as the NVIDIA Titan Xp. To enable TCC mode, see the documentation for nvidia-smi paying special attention to the -g and -dm commands. For example the following command will set GPU 0 into the TCC mode.
nvidia-smi -g 0 -dm 1
IMPORTANT: When using TCC mode in a multi-GPU system, we highly recommend setting all headless GPU’s to use the TCC mode for we have experienced stability issues when mixing headless GPU’s between the WDM and TCC modes.
NOTE: Using a TCC enabled GPU is not required, but training is much faster when in TCC mode vs WDM mode.
To start training, press the Run Training (![]() ) button in the lower left corner of the Project Window.
) button in the lower left corner of the Project Window.
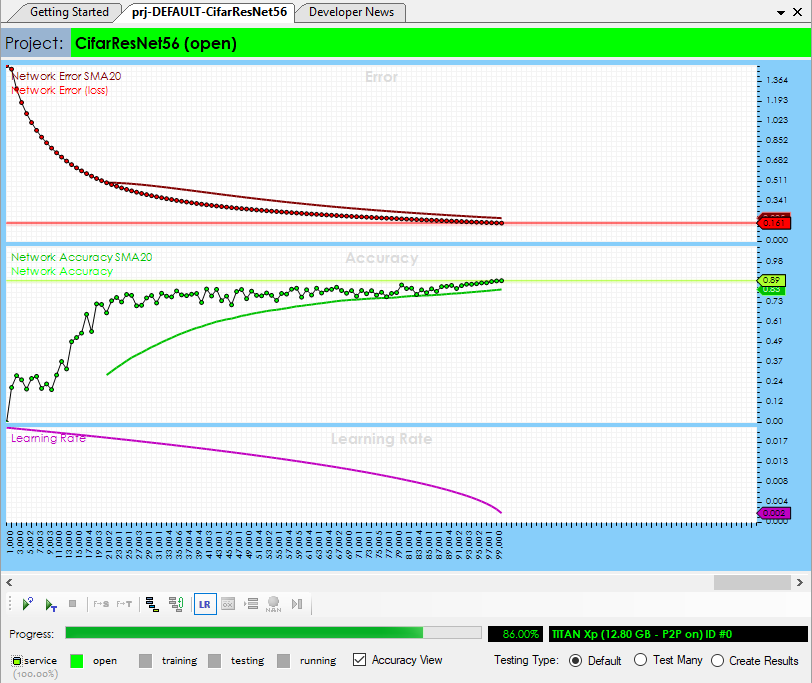
After training for around 100,000 iterations with a batch size of 128, you should see an accuracy of 88% or greater.
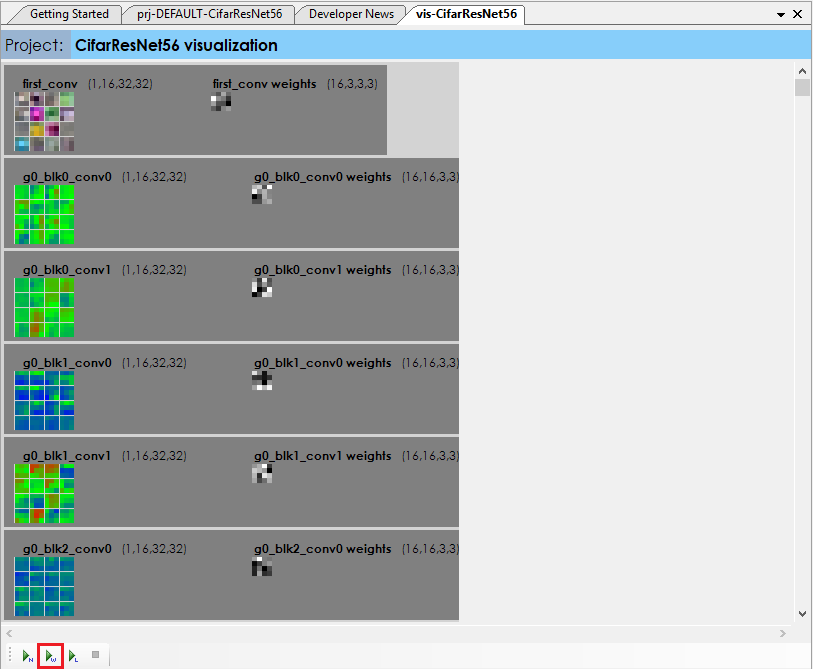
Once training completes, you can view the weights by double clicking on the Accuracy (![]() ) icon within the CifarResNet56 project and then click on the Run weight visualization (
) icon within the CifarResNet56 project and then click on the Run weight visualization (![]() ) button which will then display a visualization of the weights as shown below.
) button which will then display a visualization of the weights as shown below.
You have now created your first ResNet-56 for the CIFAR-10 dataset using the SignalPop AI Designer!
[1] Yihui He, ResNet 20 32 44 56 110 for CIFAR10 with caffe. GitHub, 2016.