

This tutorial will guide you through the steps to create a Siamese Net used to detect the hand-written characters found in the MNIST dataset as described by [1] and [2].
The Siamese Net provides the ability to perform ‘One-Shot’ learning where an image that the network has never seen before, is quickly matched with already learned classifications – if such a match exists. Several examples using Siamese Nets for one-shot learning include: Image retrieval described by [3]; Content based retrieval described by [4]; and Railway asset detection described by [5].
Before showing how to build a Siamese Net, how does it actually work? The image below shows the sequence of steps that take place when training the Siamese Net.
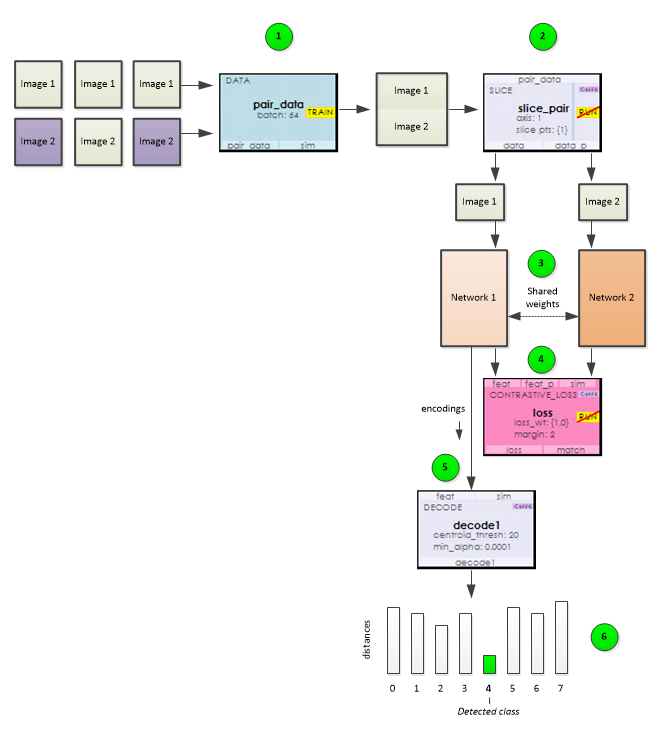
1.) Using the Data Layer, data is fed into the net as image pairs where each image is stacked one after the other along the data input channels. In order to provide a balanced training, pairs of images alternate between two images of the same class followed by two images of different classes.
2.) During training, the pairs of images loaded by the Data Layer are split by the Slice Layer which then feeds each image into one of two parallel networks that both share a set of learnable weights.
3.) Each network produces an encoding for each image fed to it.
4.) These encodings are then sent to the Contrastive Loss layer which calculates the loss from the distance between the two encodings where the loss is set to the squared distance between the two images when they are from the same class, and the squared difference between the margin and the distance when they are from different classes; which moves the image encodings toward one another when they are from the same class and further apart when they are not.
5.) During training, a Decode Layer calculates and stores the centroid encoding for each class.
6.) When running the network, the Decode Layer’s stored centroids are used to determine the shortest distance between the input image’s encoding and each classes encoding centroid. A minimum distance between the input image and a given class indicates that the input image matches the class.
Now that you know how it works, lets jump in and build a Siamese Net!
STEP 1 – Create The Dataset
Before creating the Auto-Encoder model, you will need to download the MNIST data files from here and create the single channel MNIST dataset.
To create the dataset, open the MNIST Dataset Creator from the Dataset Creators pane and add the file locations of each of the MNIST data files downloaded above. Next, make sure the Channels property is set to 1 and select the Run (![]() ) button to start creating the dataset.
) button to start creating the dataset.
To view the new MNIST dataset, expand the MNIST Dataset Creator and double click on the new MNIST dataset.
Double clicking on any image will show a larger view of the image and right clicking in an area other than an image displays a menu that allows you to view the Image Mean.
Once completed, the new dataset will be named MNIST and look as follows.

The MNIST dataset contains 60,000 training and 10,000 testing images of hand written digits.
STEP 2 – Create The Siamese Net Model
The first step in creating a model is to select Solutions pane and then press the Add Project (![]() ) button at the bottom pane.
) button at the bottom pane.
Next, fill out the New Project dialog with the project name, MNIST dataset, select Create Template-based Model/Solver and use the Siamese_28x28 model and Siamese_28x28 solver templates..
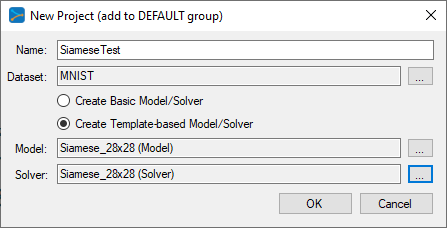
After pressing OK, the new SiameseTest project will be added to the solutions.
To view the SiameseTest model, just double click on the SiameseNet item within the SiameseTest project. This will open the visual model editor containing the deep convolutional auto-encoder (with pooling) model which looks as follows.
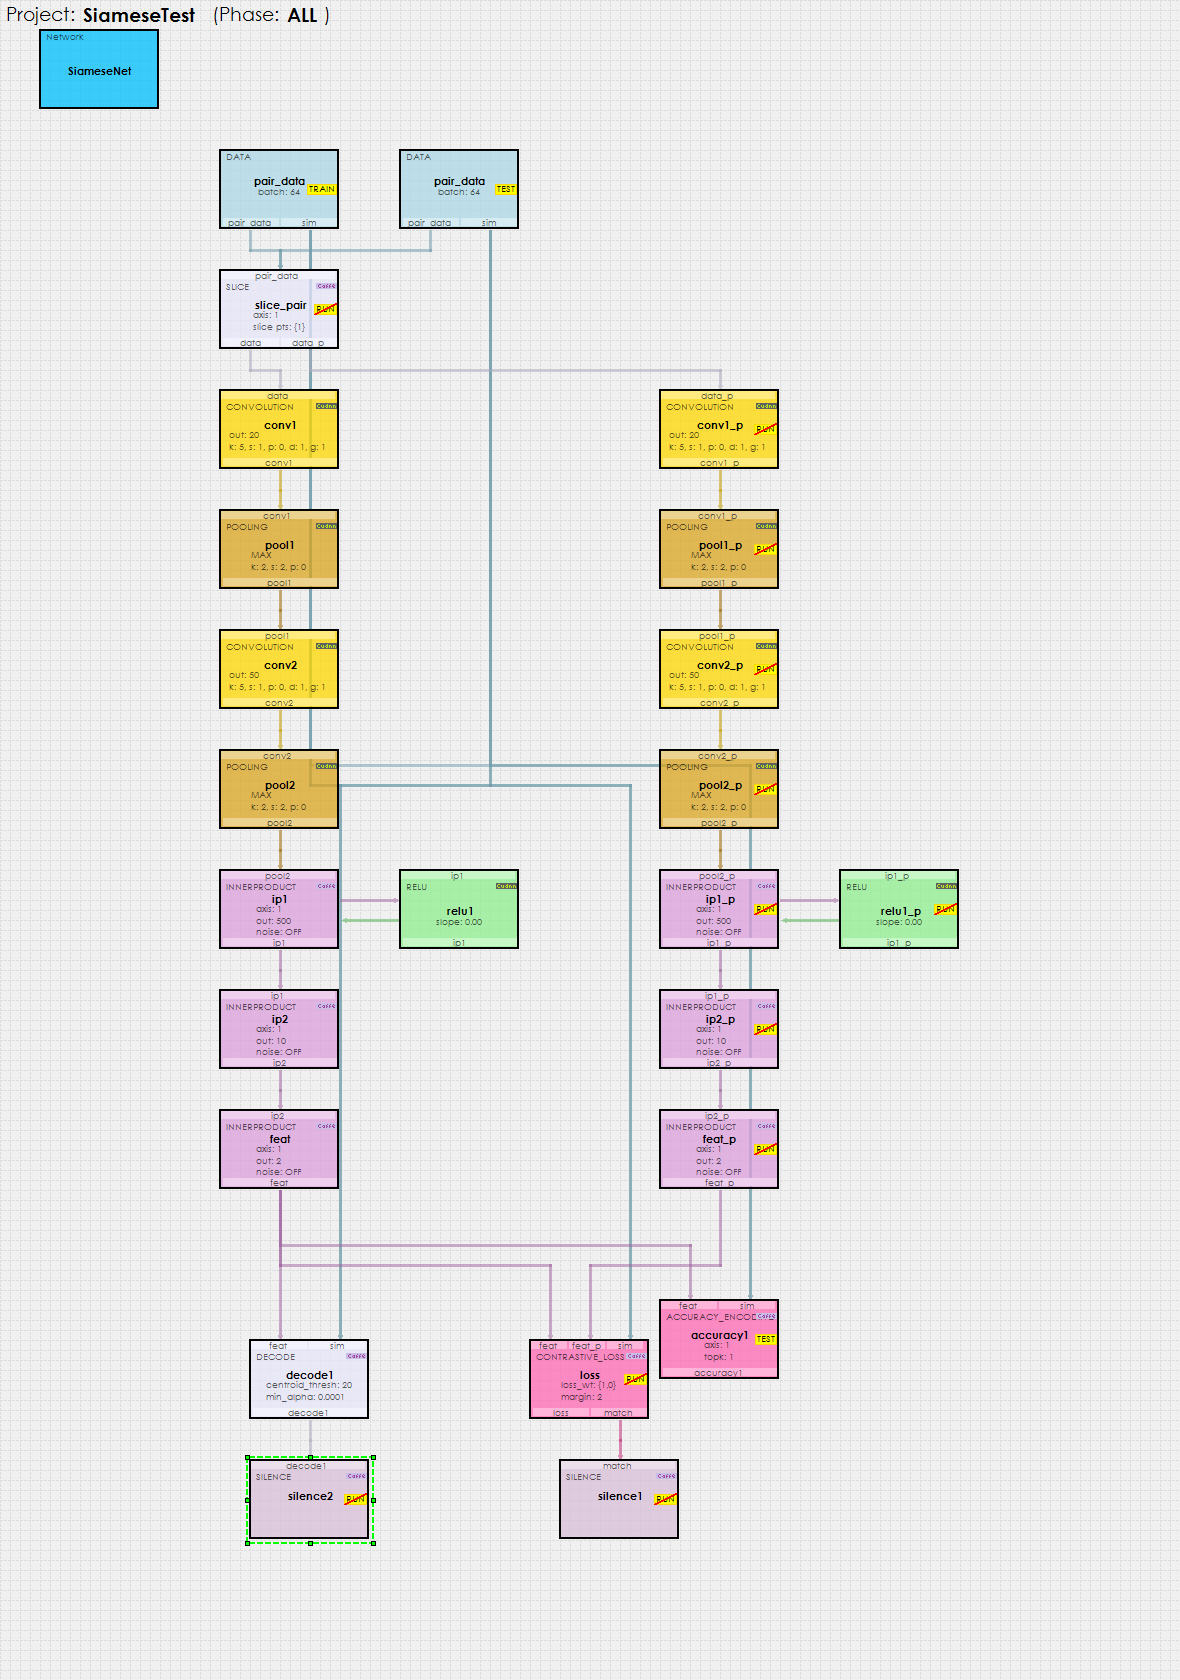
As described above, the Siamese Net comprises two parallel nets, one on the left starting with conv1 and ending with feat; and the other on the right starting with conv1_p and ending with feat_p.
Each network produces a set of encodings learned from the input images. These encodings are fed into the Contrastive Loss layer at the bottom of the model which produces a loss that pushes encodings from the same class towards one another and encodings from different classes away from one another. Once trained, the Decode layer is used to decode each encoding into the class that for which the encoding is the closest to.
Model Configuration
There are several important layer configuration settings that make the Siamese Net work.
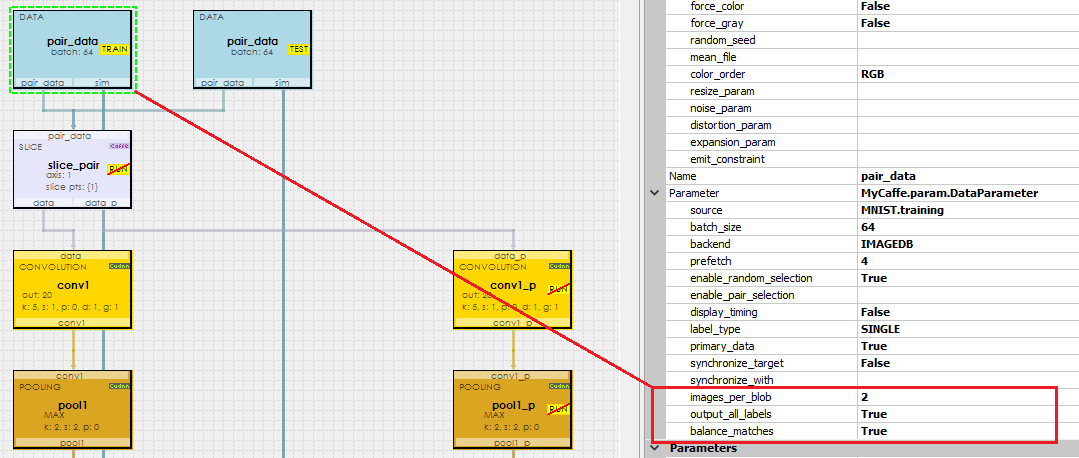
Each Data layer is configured to pack two images per channel where the image pairs alternate between two images from the same class followed by two images from different classes. The images_per_blob setting directs the Data layer to pack 2 images per channel, and the balance_matches = True setting directs the Data layer to alternate between matching classes and non matching classes. And finally, the output_all_labels = True setting directs the Data layer to output two labels per channel in the top[1] output which later allows the Decode and AccuracyEncoding layers to determine how to match up each encoding received.
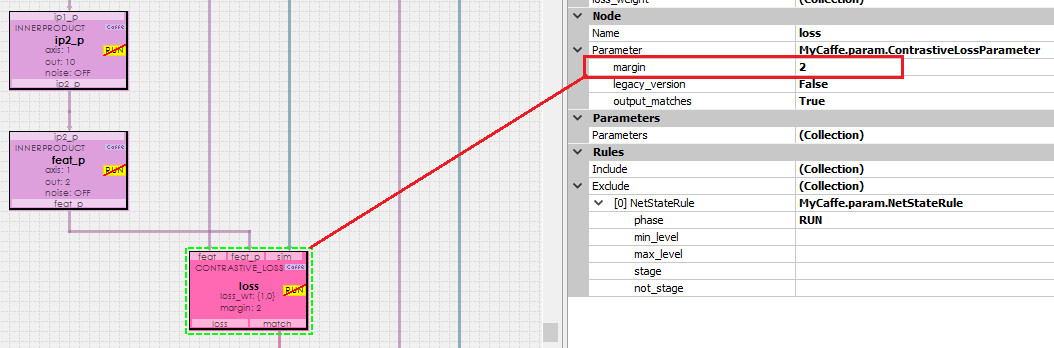
The ContrastiveLoss layer uses a setting called margin which defines the distance for which images of different classes are pushed away from one another. We have found that a margin = 2 works well with the MNIST dataset.
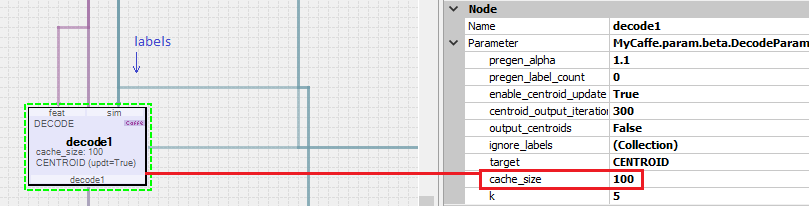
The Decode layer is used when running the network to decode each encoding into the distance between the encoding and the centroid of the encoding learned from each class during training.
Step 3 – Training and Testing the Siamese Net
To start training, press the Run Training (![]() ) button in the lower left corner of the Project Window.
) button in the lower left corner of the Project Window.
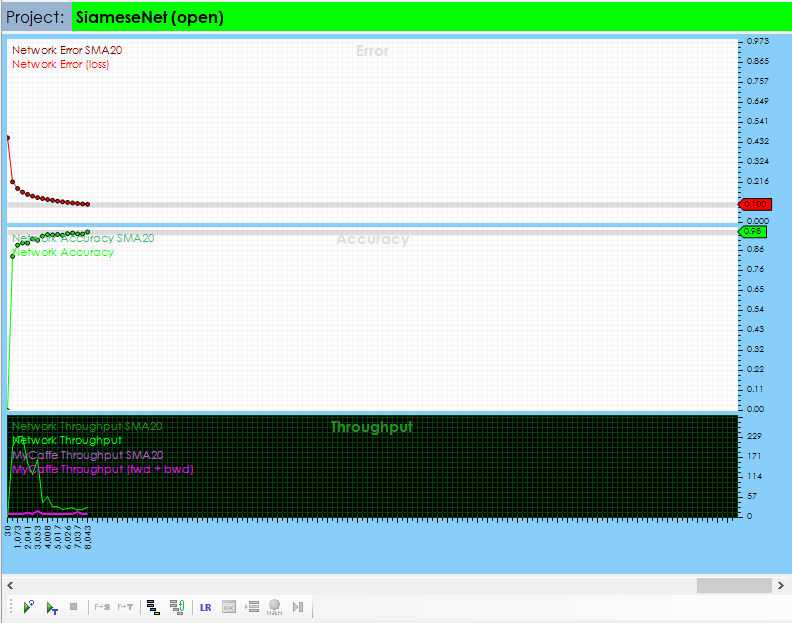
After training for around 8000 iterations with a batch size of 64, you should see an accuracy of 90% or greater.
To test the Siamese Net, stop the training and select the Test Many radio button at the bottom of the Project window and press the Run Testing (![]() ) button.
) button.

The output of the test is then displayed in the output window.
Congratulations! You have now created and trained your first Siamese Net with MyCaffe!
To see the SignalPop AI Designer in action with other models, see the Examples page.
[1] Berkeley Artificial Intelligence (BAIR), Siamese Network Training with Caffe.
[2] G. Koch, R. Zemel and R. Salakhutdinov, Siamese Neural Networks for One-shot Image Recognition, ICML 2015 Deep Learning Workshop, 2015.
[3] K. L. Wiggers, A. S. Britto, L. Heutte, A. L. Koerich and L. S. Oliveira, Image Retrieval and Pattern Spotting using Siamese Neural Network, arXiv, vol. 1906.09513, 2019.
[4] Y.-A. Chung and W.-H. Weng, Learning Deep Representations of Medical Images using Siamese CNNs with Application to Content-Based Image Retrieval, arXiv, vol. 1711.08490, 2017.
[5] D. J. Rao, S. Mittal and S. Ritika, Siamese Neural Networks for One-shot detection of Railway Track Switches, arXiv, vol. 1712.08036, 2017.